


Table of contents
- Introduction
- Why create your own VPN instead of using a VPN SaaS?
- Preparing an Algo VPN instance on AWS before travel
- Using the on the fly Algo VPN instance while travelling
- Conclusion
Introduction
Earlier this year I went travelling overseas to a country that performed internet censorship. Knowing this beforehand, I decided to set up my own VPN hosted on an Amazon EC2 instance. With a VPN, I would be able to continue using internet services such as as Gmail and WhatsApp that would otherwise be blocked in that country.
While researching self-hosted VPN solutions, I found the Algo VPN project. This project is "a set of Ansible scripts that simplify the setup of a personal WireGuard and IPsec VPN". I found this to be a good and convenient solution, so before departing on my travels, I set up an EC2 instance with Algo VPN deployed. Once arriving overseas, I was pleased to find that the VPN worked well on my mobile phone and laptop. However to my dismay, after 2 days the VPN had stopped working.
With some difficulty using censored internet, I managed to find a solution to get my VPN working again. Fortunately, AWS access was not blocked. By standing up Algo VPN on a new EC2 instance with a new public IP address, I was able to resume using a VPN connection. However, this would also stop working after a day or two. It turns out the country I was visiting had some sort of regularly changing firewall that would detect VPN traffic and block it. The only way to get around this, was to on a daily basis change the public IP address of the VPN connection.
In this blog post I will describe the solution I came up with to be able stand up a new VPN connection (with a new public IP address) on the fly while travelling overseas. This solution uses an AWS EC2 Launch Template to deploy Algo VPN on an Amazon EC2 host. The AWS Console Mobile app can then be used to stand up the VPN EC2 instance while travelling.
Why create your own VPN instead of using a VPN SaaS?
From the perspective of simply needing access to blocked internet services while overseas, then there are many VPN service providers available that will do the job. I frequently see these VPN services advertised on YouTube videos. These VPN services appear to be be easy and convenient to set up. So why spend time and effort setting up your own VPN service?
The main reason for creating your own VPN comes down to the level of trust of a VPN service handling your browsing data. Ideally, you want your data secure and private so that no one but you has access to it. Even if a VPN provider claims they provide a secure service and do not record any of your data, there is no way to be certain of this. By creating your own VPN, you will have greater control and visibility of how your data is processed.
Another consideration is that some VPN service providers are not always reliable. Some countries can have regularly changing firewalls that can detect and block VPN traffic. A VPN service provider may not be able to adapt to regularly changing firewall VPN blocks so frequently, resulting in an unreliable service. As mentioned before, I had to change my own VPN instance IP address on a daily basis to continue using it.
If you have some experience in standing up a Amazon EC2 instance and navigating a Linux shell, then setting up your own VPN instance using Algo VPN is straight forward. Carry on reading to see how this is done.
Preparing an Algo VPN instance on AWS before travel
Before embarking on your overseas travel, it is best to set up all the AWS resources for your VPN instance beforehand. It is easier to do this on a desktop/laptop, on a trusted and reliable internet connection rather than from on a smartphone, overseas on mobile roaming data.
Below lists the AWS resources that will need to be created for the VPN solution:
S3 Bucket - to store your VPN client config.
EC2 IAM role - for your VPN EC2 instance permissions to upload config to S3.
Security group - to allow VPN connections to your VPN EC2 instance.
Launch template - for saving your VPN EC2 instance launch parameters.
The heavy lifting of installing and configuring the VPN software on the EC2 instance host is carried out by Algo VPN which you can read more about here: https://github.com/trailofbits/algo
Select an AWS Region
When creating a VPN in AWS, you will need to decide which AWS region you want to host your VPN EC2 instance in. The IP address location of the devices that connect to the VPN will that of your selected AWS region location. It is recommended that you select an AWS region that is close to the location you will be travelling to and using the VPN in.
The AWS Console will be used to create all the required AWS resources for the VPN instance. When using the AWS Console, you are able to select the AWS region from the top right corner drop down.

In this blog post examples, I use the region Asia Pacific (Singapore) ap-southeast-1.
Create an S3 bucket for VPN config
An S3 bucket is used to store the VPN client configuration.
To create the S3 bucket, go to the AWS S3 Console and ensure you have your desired AWS region selected.
Choose Create bucket then provide your S3 bucket a name.
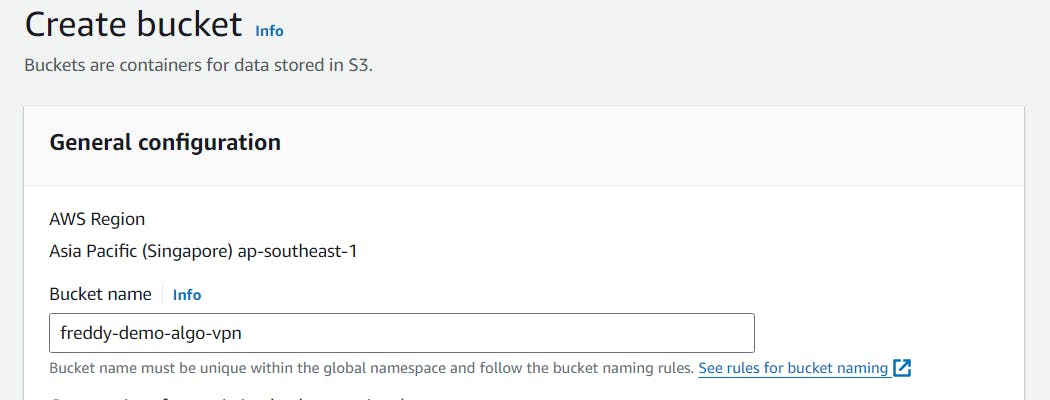
Leave all other settings as defaults then choose Create bucket.
Create an EC2 IAM role for the VPN EC2 instance
An EC2 IAM role (instance profile) is required to provide VPN EC2 instance with permissions to upload the VPN client configuration to the S3 Bucket.
To create the IAM role, go to the AWS IAM Console.
In the lefthand side navigation pane, under Access management choose Roles, then choose Create role.
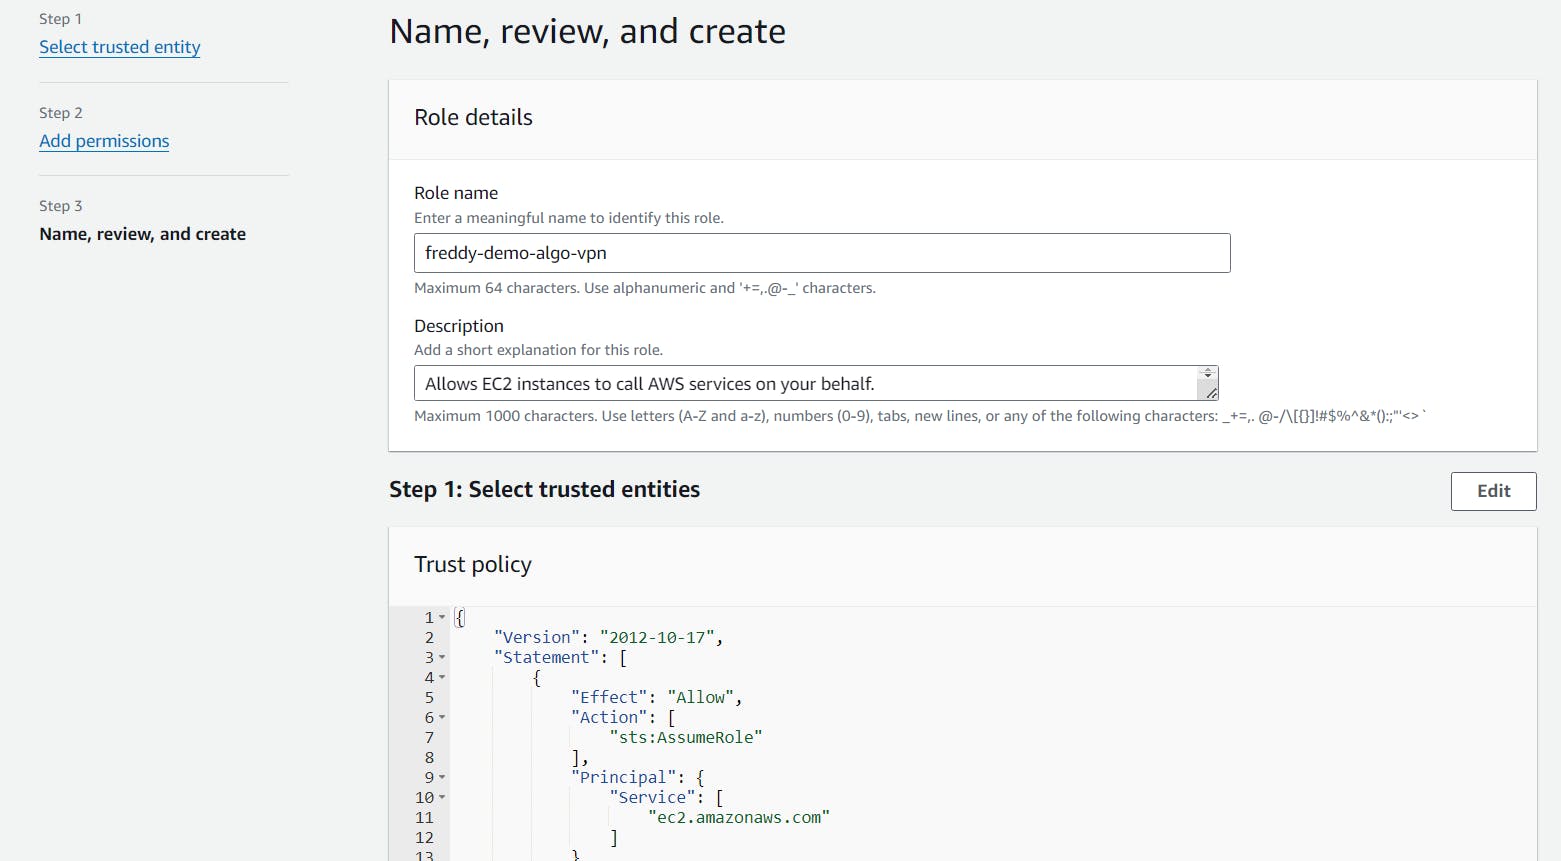
Under Trusted entity type, select AWS service, then under Service or use case, select EC2 then choose Next.
In the next step, Add permissions, choose Next. (We will create a custom inline policy later).
Under Role details, provide a Role name, then choose Create Role.
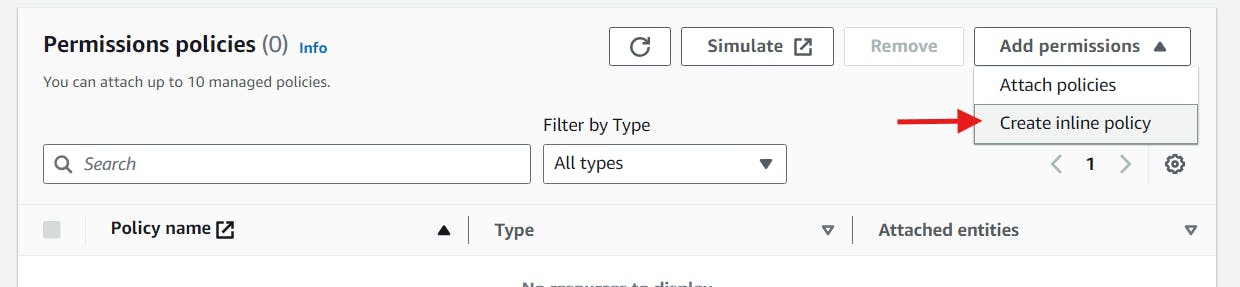
After the IAM role has been created, select it then in the Permission policies section choose the Add permissions drop down then choose Create inline policy.
In the Policy editor section, select JSON, then paste the following policy. Replace freddy-demo-algo-vpn with the S3 bucket name you created.
{
    "Version": "2012-10-17",
    "Statement": [
        {
            "Effect": "Allow",
            "Action": [
                "s3:PutObject",
                "s3:GetObject",
                "s3:ListBucket"
            ],
            "Resource": [
                "arn:aws:s3:::freddy-demo-algo-vpn/*",
                "arn:aws:s3:::freddy-demo-algo-vpn"
            ]
        }
    ]
}
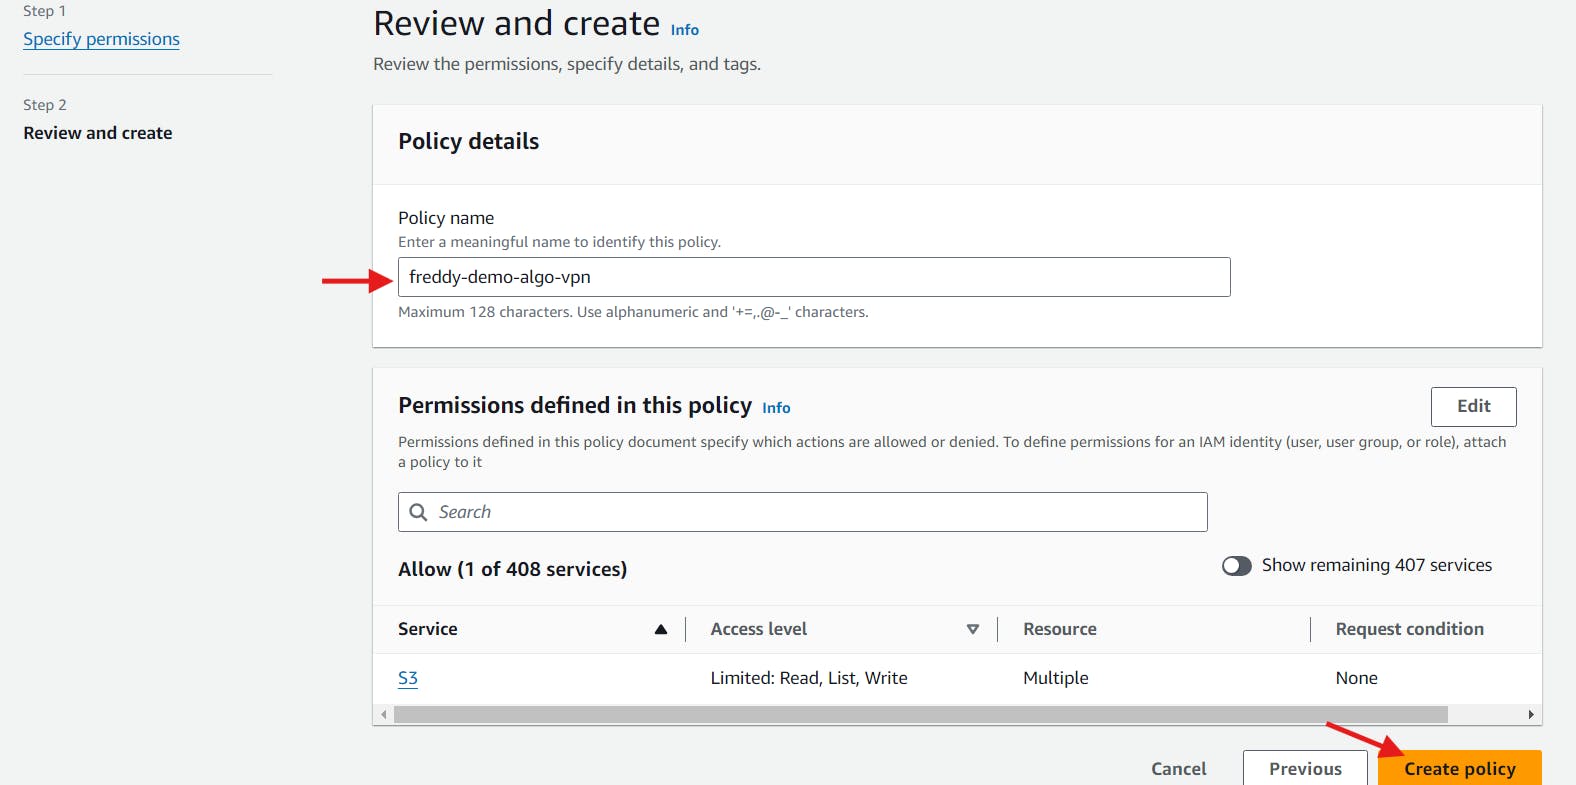
Choose Next.
In the Policy details provide a Policy name, then choose Create policy.
Create a security group for the VPN EC2 instance
A security group is used to control what inbound connection are allowed to the VPN EC2 instance. We will need to allow a number of inbound ports for the VPN service which are described here.
The security group is created for a specified VPC. In this example, I will be using the default VPC which comes with public subnets (attached with an Internet gateway) for internet access.
To create the security group go to the Amazon EC2 console and ensure you have your desired AWS region selected.
In the lefthand side navigation pane, under Network & Security, choose Security Groups, then choose Create security group.
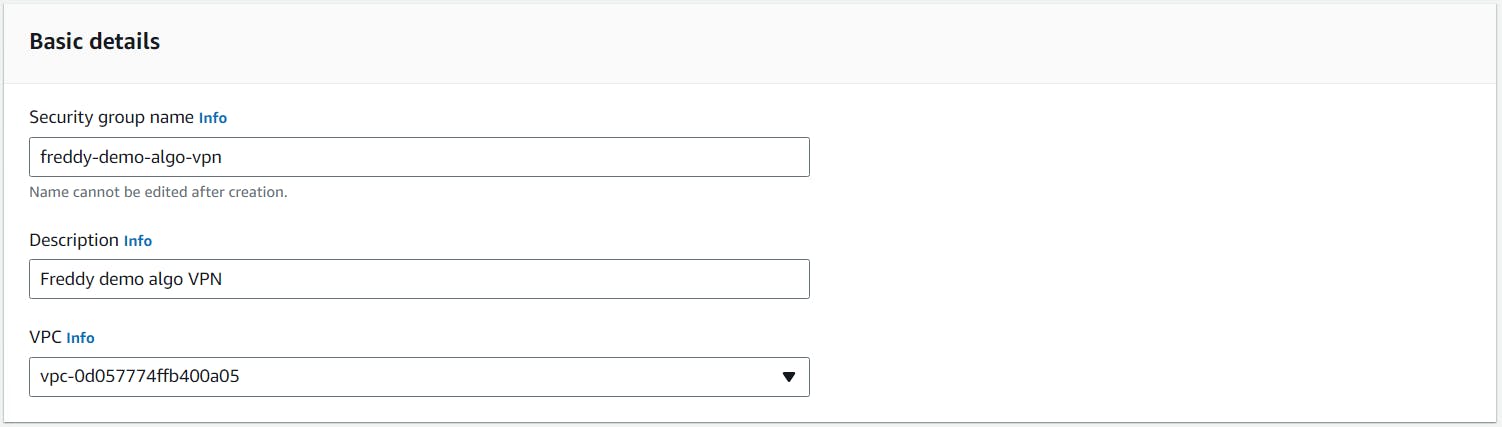
In the Basic details section, provide a Security group name and Description for your security group.
Under VPC, select your desired VPC (Default VPC is used this example).
In the Inbound rules section add the following rules.
| Protocol | Port range | Source | Description |
| UDP | 500 | 0.0.0.0/0 | IPsec IKEv2 |
| UDP | 4500 | 0.0.0.0/0 | IPsec NAT-T |
| UDP | 51820 | 0.0.0.0/0 | WireGuard |
| TCP | 4160 | 0.0.0.0/0 | SSH (optional) |

In the Outbound rules section, leave the All traffic rule there.
Choose Create security group.
Create a launch template for the VPN EC2 instance
A launch template is used to contain all the configuration settings to launch a EC2 instance with an Algo VPN deployed VPN service. You then simply need specify only the launch template to stand up a new VPN EC2 instance.
To create the launch template go to the Amazon EC2 console and ensure you have your desired AWS region selected.
In the lefthand side navigation pane, under Instances, choose Launch Templates, then choose Create launch template.
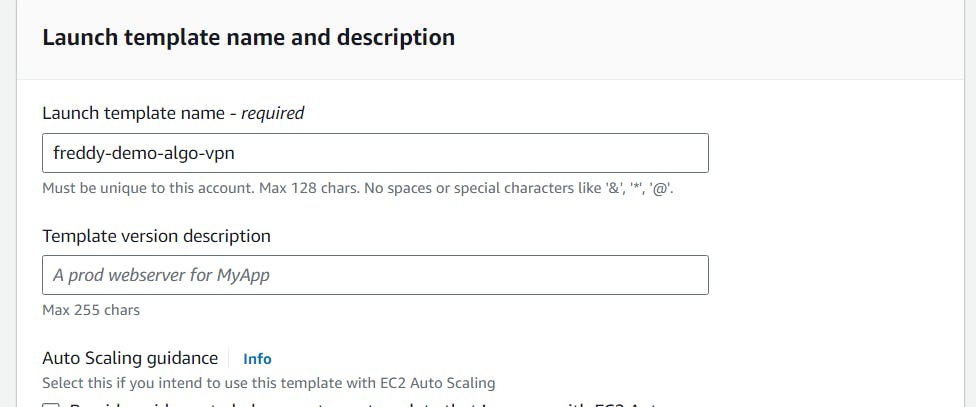
In the Launch template name and description section, provide a Launch template name.
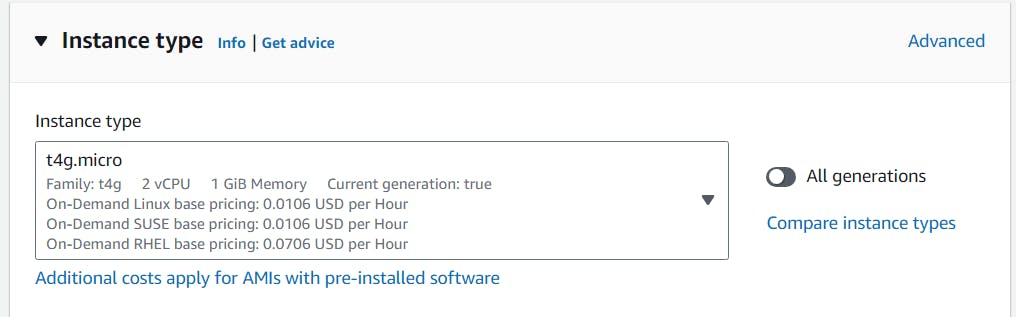
To keep EC2 instance running cost low with good VPN performance, I use a t4g.mico instance which uses Arm-based architecture. If you are eligible for AWS Free Tier, you can consider using a t2.micro or t3.micro which are x86-64 architectures.
To use the t4g.mico instance type, in the Application and OS Images (Amazon Machine Image) section, choose Ubuntu.
Under Architecture drop down select 64-bit (Arm).
Under Amazon Machine Image (AMI) select the current version of Ubuntu Server 22.04 LTS.

In the Instance type section, select t4g.micro.
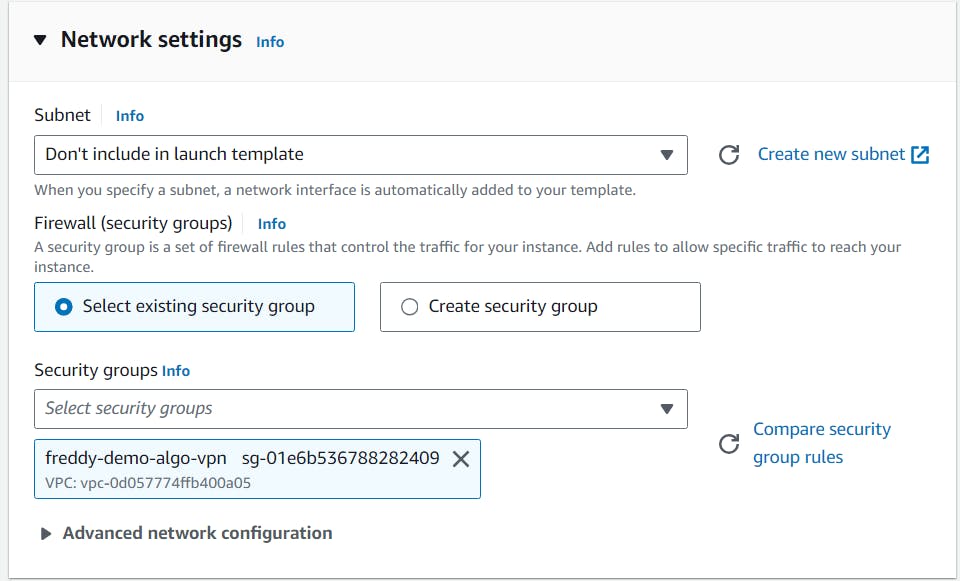
In the Network settings section, select the security group you had created previously.
In the Resources tag section, choose Add new tag to add a "Name" tag of your desired value, attached to Resource types "Instances". This tag will help identify instances that are launched by this launch template.

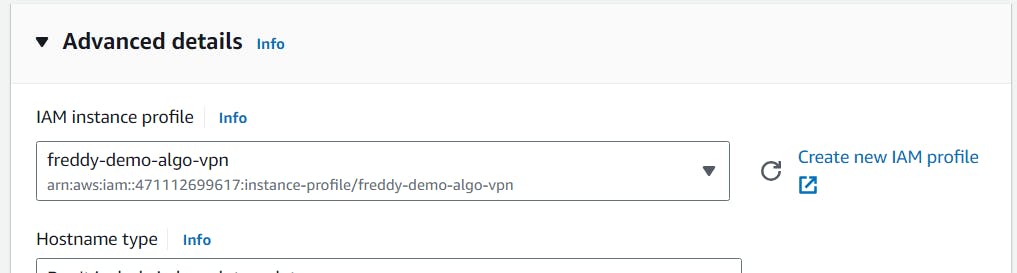
Expand Advanced details section, then under IAM instance profile, select the EC2 IAM role you had previously created.
Under Metadata version, select V1 and V2 (token optional).
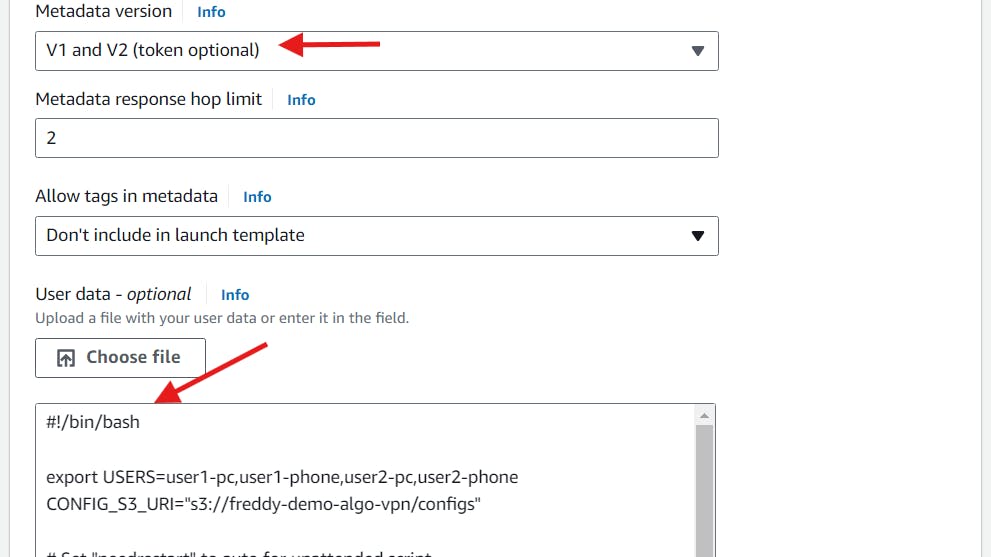
Under User data, paste the following script.
#!/bin/bash

export USERS=user1-pc,user1-phone,user2-pc,user2-phone
CONFIG_S3_URI="s3://freddy-demo-algo-vpn/configs"

# Set "needrestart" to auto for unattended script
sed -i "s/#\$nrconf{restart} = 'i';/\$nrconf{restart} = 'a';/" /etc/needrestart/needrestart.conf

apt-get update
apt-get upgrade --yes

# Install awscli
apt install awscli -y

# Install Algo VPN
curl -s https://raw.githubusercontent.com/trailofbits/algo/master/install.sh | sudo -E bash -x

# Upload Wireguard config to S3
echo "Uploading Wireguard config to $CONFIG_S3_URI"
aws s3 sync /opt/algo/configs/localhost/wireguard $CONFIG_S3_URI
The USER variable contains a comma separated list of VPN client user names. Each user will have unique client config generated for it. In this example, there are 4 users (user1-pc, user1-phone, user2-pc, user2-phone). Replace these user values to what you desire.
Replace the variable CONFIG_S3_URI value with the S3 URI of your created S3 Bucket.
The script will deploy Algo VPN using the script provided at https://raw.githubusercontent.com/trailofbits/algo/master/install.sh. For more information about configurable variables see here.
The script will also install AWS CLI which is uses to upload the WireGuard VPN Client config to your created S3 bucket.
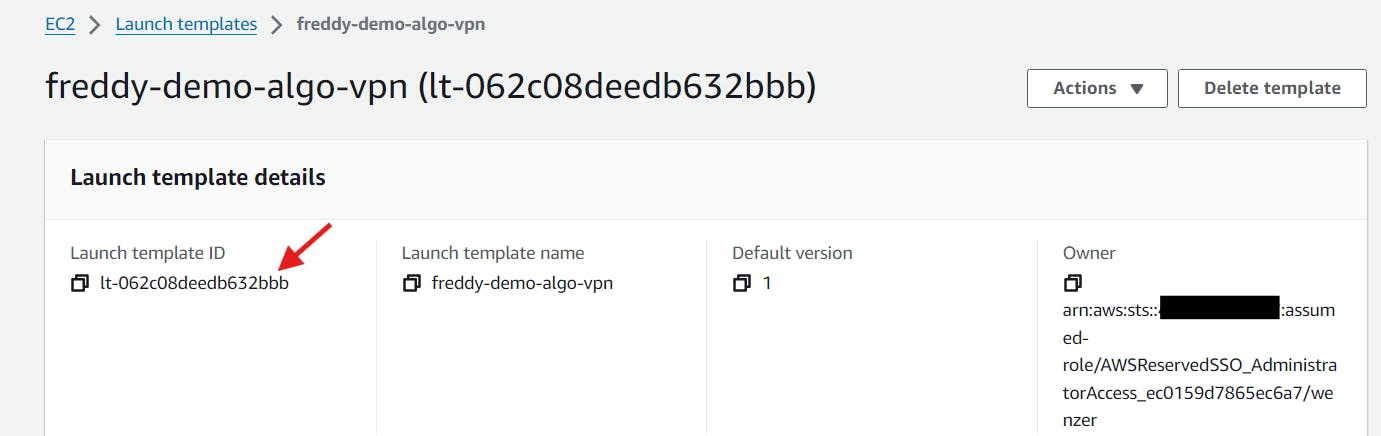
To complete the creation the launch template, in the Summary section, choose Create launch template.
Take note of your Launch template ID as this will be needed later when launching your VPN EC2 instance.
Notes about the launch template
Algo VPN uses Instance Metadata Service Version 1 URL (
http://169.254.169.254/metadata/v1/vendor-data) to determine the cloud provider and then set the endpoint config to a public IP address. To support this, the launch templateMetadata versionis set toV1 and V2 (token optional).Ubuntu server 22.04 uses
needrestartto restart daemons after applications are upgraded. This occurs when runningapt-get upgradeandapt install awscli. By default this is set to interactive mode which disrupts the launch template user data script from running unattended. We can setneedrestartto auto restart mode by altering it's configuration file with:sed -i "s/#\$nrconf{restart} = 'i';/\$nrconf{restart} = 'a';/" /etc/needrestart/needrestart.confThe launch template user data script uses
s3 syncto upload all the WireGuard configuration files in directory/opt/algo/configs/localhost/wireguardto your S3 bucket. Each time a new VPN EC2 instance is launched, thes3 synccommand will overwrite existing file names in the S3 bucket. This is fine if you're only using one VPN at a time, because you only need to the WireGuard configuration files of the current latest launched VPN EC2 instance.
Download mobile apps before travel
If you wish to use and manage the VPN instance from your smartphone while travelling, then there are two apps that you will need. It is a good idea to download and install these app before you depart on your travels.
The first app is the VPN client, WireGuard. This can be downloaded here:
The second app is the AWS Console Mobile App which we will use to manage the VPN EC2 instance. Links to download can be found here:
Check that you can log in to you AWS account and AWS region from the AWS Console Mobile app.
Set up launch script in AWS CloudShell
We will be using the AWS Console Mobile app to launch VPN EC2 instances using the launch template we have created. Unfortunately, the mobile app does not provide a native way to do this. As a work around, we will prepare a simple script in our AWS CloudShell home directory to launch the VPN EC2 instance using the launch template. We can access the CloudShell from the mobile app to run the script. You can set up the script first in AWS CloudShell using a PC, where it is easier to type using a keyboard.
To prepare the script, go to the AWS Console and ensure you have your desired AWS region selected.
In top bar, click the CloudShell icon.

In the commands provided below, replace the LaunchTemplateId value with your created launch template ID, then paste it in to your CloudShell terminal.
echo "aws ec2 run-instances --launch-template LaunchTemplateId=lt-062c08deedb632bbb" > launch_vpn.bash
chmod +x launch_vpn.bash
This will create the launch_vpn.bash script file in your CloudShell home directory. This file will remain for 120 days from your last CloudShell session.
Using the on the fly Algo VPN instance while travelling
With the launch template for the Algo VPN EC2 instance prepared, we are now ready to launch and use the VPN. To launch the VPN instance while travelling, all you will need is your smartphone with the AWS Mobile Console app and WireGuard app installed beforehand (see here).
To launch the VPN EC2 instance, open the AWS Mobile Console app then choose CloudShell icon on the bottom right. We will now run the launch script we prepared earlier (here).
At the prompt type in the command:
./launch_vpn.bash
A tip: shell auto complete works in AWS CloudShell. After typing the first few characters of the script filename, press the Tab button to auto complete.

You can see the launched instance details under Services > EC2 > Instances.
It takes about 7 minutes using a t4g.micro instance for the VPN service to come up. Once the VPN service is up, the VPN client configuration will be uploaded to your S3 bucket.
Download the config from the S3 Bucket using AWS Mobile Console app by going to Services > S3, then choosing your S3 Bucket.
Choose the ellipsis button (...) > More. You can then navigate through your S3 Bucket and find your VPN client user name .conf file, then choose the Download button.
Once the VPN client config file is downloaded, open it up in the WireGuard app. You may be prompted to enter your smartphone pin to add the VPN configuration. To turn on the VPN, toggle the switch on against your VPN client user name.
Note that the WireGuard VPN client config also comes in QR format which are the .png files in the S3 Bucket. You can configure the VPN on other devices with a camera by using the WireGuard app to scan the QR code in the PNG files.
When you no longer require the VPN instance, it can be terminated by going under Services > EC2 > Instances. Choose your VPN EC2 instance then choose ellipsis button (...), finally choose Terminate.
If your VPN connect stops working, you can repeat the above steps to create a new VPN EC2 instance. Each launched VPN EC2 instance will have a new IPv4 address from that AWS Region's IP address pool.
Note that stopping then starting the VPN EC2 instance will also assign it a new public IPv4 address. This will stop your VPN connection from working because the VPN client configuration is set to use the initial IP address it is first launched with.
Conclusion
In this blog post, I demonstrated how a launch template can be used to repeatedly create a VPN service hosted on an Amazon EC2 instance. The launch template uses Algo VPN to deploy and configure a personal WireGuard VPN. You can then stand up your VPN instance as you need it while travelling overseas, using the AWS Console Mobile app on your smartphone.
This VPN solution worked well for me while travelling overseas. As long as I had an adequate mobile network connection to AWS, I could stand up a personal VPN service on the fly. I was then able to access internet services that are blocked such as Google Maps. It's funny how there are plenty of reviews in Google maps for locations in the foreign country I visited. Seems like I'm not the only one using a VPN there!